In this article, we’ll show you how to create your own custom icon set in Beaver Builder. You may find that at times, the icons available by default in WordPress aren’t sufficient and having more appropriate icons at your disposal will greatly enhance a project’s UI.
For those interested in watching a video on how to upload your custom icons in Beaver Builder:
Beaver Builder makes it really easy to upload your own custom icons and the following steps will let you know how to do it.
1) Download the icons you require in SVG format
2) Go to the Icomoon App website – https://icomoon.io/app/#/select
3) Click ‘Import Icons’ button on the top and import your icons.
![]()
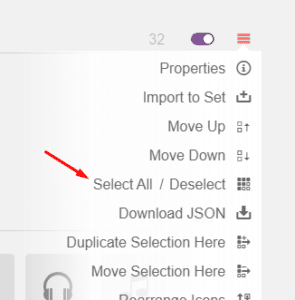
4) The icons will be imported in the first row called “Untitled Set”. Click on the hamburger menu at the far right and choose ‘Select All’

5) Once all the icons are selected, click on the ‘Generate Font’ at the bottom right of the page.

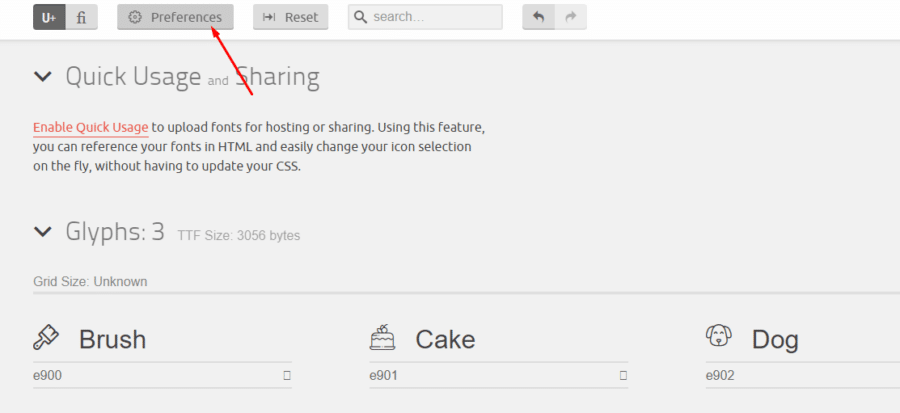
6) The page that opens will display the icons that you want to create an icon set of. You have the option to remove any icon by simply hovering on it and remove from the list, if you want. Once you’ve decided to create the set, click on ‘Preferences’ button found at the top of the page.
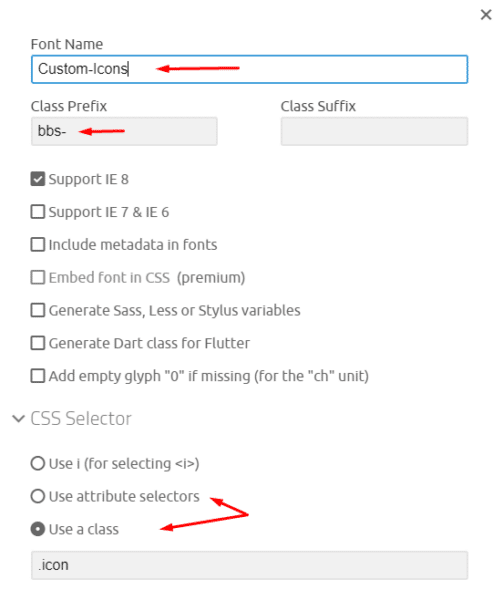
7) You need to provide a unique name for the set (the default name provided is icomoon). I prefer naming it different so it becomes easy for me to quickly glance and know which set I’ve imported in Beaver Builder, when I’m working in the backend.
You also must change the class prefix from icon- to something else. As you can see in the screenshot below, I’ve given it a prefix of bbs- but you can provide anything else to differentiate. This step of renaming the prefix is crucial because if left unchanged, multiple icons using the same class of icon- may conflict and either display incorrectly on the frontend or not display at all.
Under the ‘CSS Selector’ dropdown, you can either choose: Use attribute selectors or Use a class.
I simply chose a class for the sake of keeping things simple.
With these couple of changes, you can click ‘X’ at the top right and exit the popup.
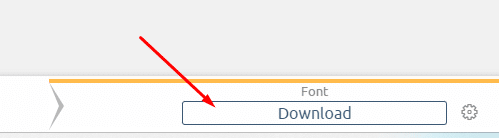
8) Then simply click ‘Download’ at the bottom right of the page, which will initiate the download of your custom icon set in a zip folder.
9) Once downloaded, go to your WordPress dashboard > Settings > Beaver Builder > Icons and upload the zip folder.
10) The page will refresh automatically and display the icon set by its name. You can then click on the ‘Save Icon Settings’ button.
![]()
That’s it! You’ve successfully created and imported your own custom icon set in Beaver Builder. You can now use your custom icons as you normally would. Just go to any module with any icon (such as the button module) and you can use your icons in there. These custom icons also get available for 3rd party add-ons such as UABB and PowerPack.
![]()
Now, that’s a powerful way to bring your A-game to design a website and leave your clients impressed!