There’s a reason why most sites on the web are self-hosted WordPress websites. The amount of customization that WordPress allows is insane and there is nothing comparable to it elsewhere. WordPress has given us many new features recently that continue on the road to full site editing, which would make it easier for everyone using WordPress to make changes to their website pages or design easily by bringing new customization options to parts of your website that do not require coding or extensive WordPress knowledge. When you have a theme compatible with WordPress full site editing, you’ll be able to drag and drop different blocks and make changes to your website’s menus, theme, logo, typography, site headers and footers, individual blocks and more without having to go to different admin pages. Keep reading for a full breakdown of specific ways you can use full site editing on your website, and examples of different websites who have already tested it. If you have any questions about your website design or want us to handle it for you, reach out to us at Prebuilt Sites or The BBS Agency. We’d love to help you out!
The latest release of WordPress is here and it brings us loads of new features. In a nutshell, WordPress 5.9 is the next stop on the road to full site editing. But what does that mean? What is full site editing and what can you do with it? In this blog post, we’ll discuss exactly that and give you a few examples of WordPress websites that use full site editing.
First things first: what is full site editing?
You might have noticed this term buzzing around in the WordPress community, but what is full site editing? To break it down for you, full site editing is a collective term for several new WordPress features:
- Template editing: where you can customize the design of posts and pages.
- Site editing: for changing the design of your blog, archives or 404 page, as well as your site header and footer.
- A new Styles interface: where you can add your own color palettes and change colors, typography and spacing.
- A new kind of theme: that is fully editable, built with blocks.
The common thread in full site editing (FSE) is that all features use blocks to create your website. Full site editing also brings new tools to developers, including a new theme configuration file. Now, to take full advantage of the new features in WordPress version 5.9, you do need to activate a full site editing theme. An example of a full site editing theme is Twenty Twenty-Two.
What is the idea behind full site editing?
So, why is the WordPress community investing so much time in full site editing? Well, the idea behind full site editing is to extend the use of blocks for creating content to the rest of your website. To empower users and bring new customization possibilities to parts of your website that were previously only editable by using code or complex options. Therefore, making it easier for everyone using WordPress to change the design of their website and pages.
What are the advantages?
Simply put, the most significant advantages are that you can edit and preview your whole website in the editor. You can place blocks anywhere you like and then change the style of these blocks from a single interface. With this, full site editing brings a more complete and consistent editing experience. You don’t need to go to different admin pages to change your site title, update your menu, arrange widgets, or upload a logo. Instead, you can do all of this while you stay in the editor.
Another advantage worth mentioning is that themes can add premade designs for pages (templates), site headers and footers (parts), and block patterns. You can simply drag and drop block patterns to create unique designs and save them in your own templates.
The current state of full site editing
As mentioned before, the latest WordPress release is the next stop on the road to full site editing. But it is good to know that the new Site Editor added in WordPress 5.9 is in beta. You can use the new default theme Twenty Twenty-Two with WordPress 5.9 and you can expect bug fixes and improvements in future releases. It’s also good to know that you can use full site editing with and without the Gutenberg plugin.
There are many small parts in full site editing. Including new blocks and block settings that, unfortunately, were not ready in time for WordPress 5.9. But they are on the roadmap! Some of the planned improvements are:
- A new set of comment blocks
- Improved controls for spacing and positioning blocks, and for selecting font families
- New post author blocks
- More settings for the query block, which is used to display a list of posts (like your blog)
Two features that are still missing are better responsive controls and the ability to create new page templates for categories.
How does full site editing work?
When you activate a full site editing theme, you may be surprised to see that the menu screen, widgets, and the customizer are nowhere to be found in the WordPress admin. Instead, WordPress enables a new editor where you can preview and edit your site. The customizer is actually replaced by block settings and Styles. When it comes to widgets, those are actually no longer needed because you can place blocks anywhere. And the menu system is replaced by the navigation block.
The Site Editor
When you go to the new editor, the first page that you’ll see is your current home page. The editor has several optional sidebars: Settings, Styles, and the Site Editor navigation. To open the site editor navigation, click on the WordPress icon or site icon that you’ll find at the top left of the editor:
In the side editor navigation sidebar, you can find the options Templates and Template Parts. By selecting one of those, you open a separate page where you can view and manage all your templates and parts:

Editing your site header and navigation
One of the first things you probably want to try out is setting up your website’s menu(s). This is how you do that with full site editing:
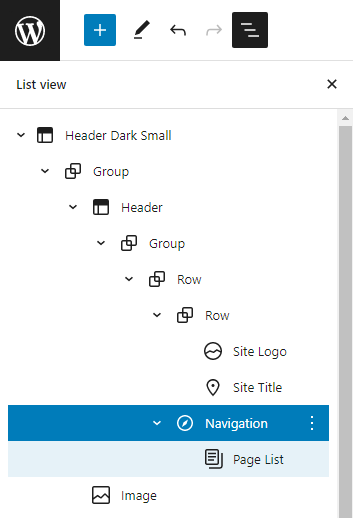
- Firstly, open the Editor (beta) from the Appearance menu in the WordPress admin.
- You can either select the navigation block directly in the editor or select the block from the list view. The list view is a list of all the blocks on the page. To open the list view, click on the symbol with the three lines in the top toolbar.
- Click on Header to expand the list. Next, click on the Navigation block to select it.
(Photo: Yoast)
4. Now you can click on the plus icon to add new menu items. You can search for a post or page, create new drafts or even add a site logo, social icons or a search form:
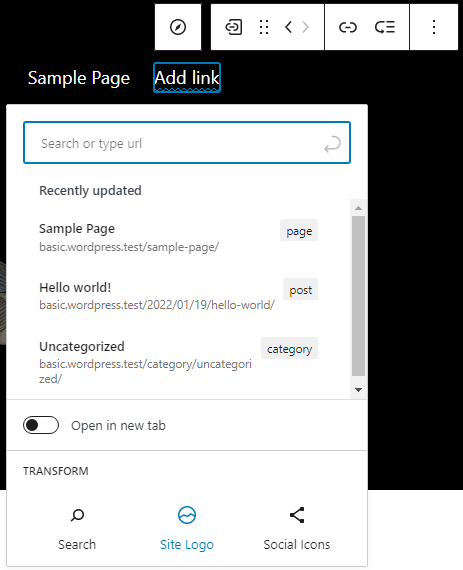
(Photo: Yoast)
The navigation block has several styling options. For example, you can add colors, change alignment and font size, and decide if the navigation should collapse behind a menu button. In addition, you can give your menu a custom name in the Advanced section.
When you’ve finished setting up your menu, don’t forget to select Save. You will be asked if you want to save your website’s header and the menu. Save both and check out the brand new menu of your website.
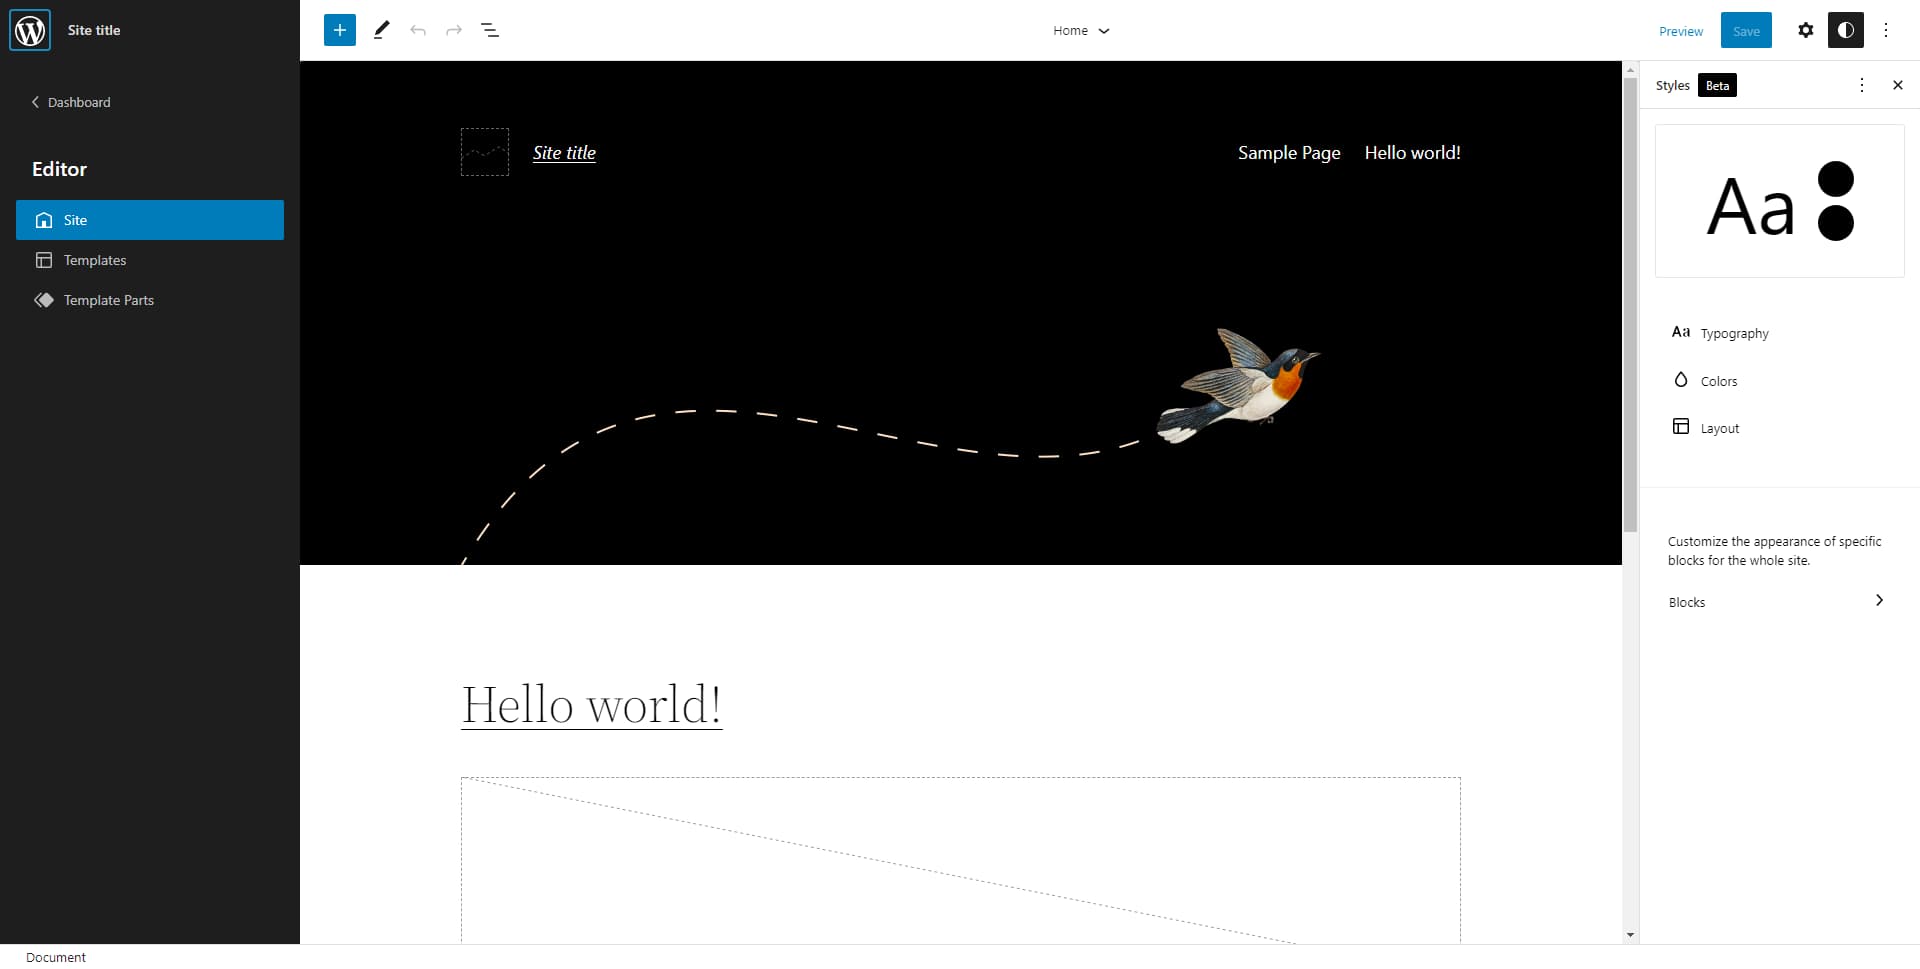
Changing the look of your site using Styles
To stay with our example of the Twenty Twenty-Two theme, this one has a dark header on the home page and the rest of the pages are white. Let’s go into changing the look of these pages. And let’s say you want to give the pages a dark background color.
- Your first step is to open the Editor from the Appearance menu in the WordPress admin.
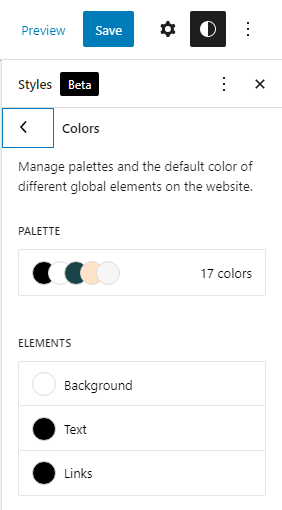
- In the top bar, next to the save button, click on the black and white circle to open the Styles sidebar. Under Styles you can choose between typography, colors and spacing for the website and for the blocks.
- To change the background color, select Colors. In this view, you will see the themes color palette and a list of elements like background, text, and links.
- Select Background and change it to black. You can preview your color changes live in the editor.
- You need to change the text and the link color as well to make them readable: Go back one step and do the same for text and links, but select white.
(Photo: Yoast)
Changing the look of specific blocks
Okay, so that allows you to change the appearance of a few basics on your pages. But what if you want to change the look of specific blocks, for example, your post title block?
- Go back to the top bar, next to the save button, and click on the black and white circle to open the Styles sidebar. Select Blocks at the bottom of the Styles sidebar, below the accompanying text: Customize the appearance of specific blocks for the whole site.
- After that, select the post title block and open the Typography panel.
- By using this options panel you can change the look of all post title blocks at once: Font family, size, line height, appearance (bold or italic) and letter spacing. Try a few of the settings and preview the changes live in the editor.
- Save your changes. You will be asked if you want to save custom styles: Go ahead and confirm.

(Photo: Yoast)
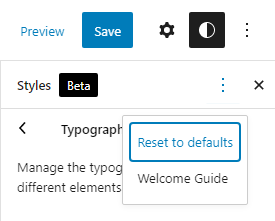
What if you change your mind and want to undo the changes?
No problem, this is possible at any moment. Simply click on the “More Global Styles Actions” ellipsis menu in the Styles toolbar and select “Reset to defaults”:
(Photo: Yoast)
Creating a new page template with a sidebar
In the template editor, you can actually create new templates for your posts and pages. There are lots of options, but to give you an idea of how this works, let’s discuss how to create a new template for a page with a sidebar.
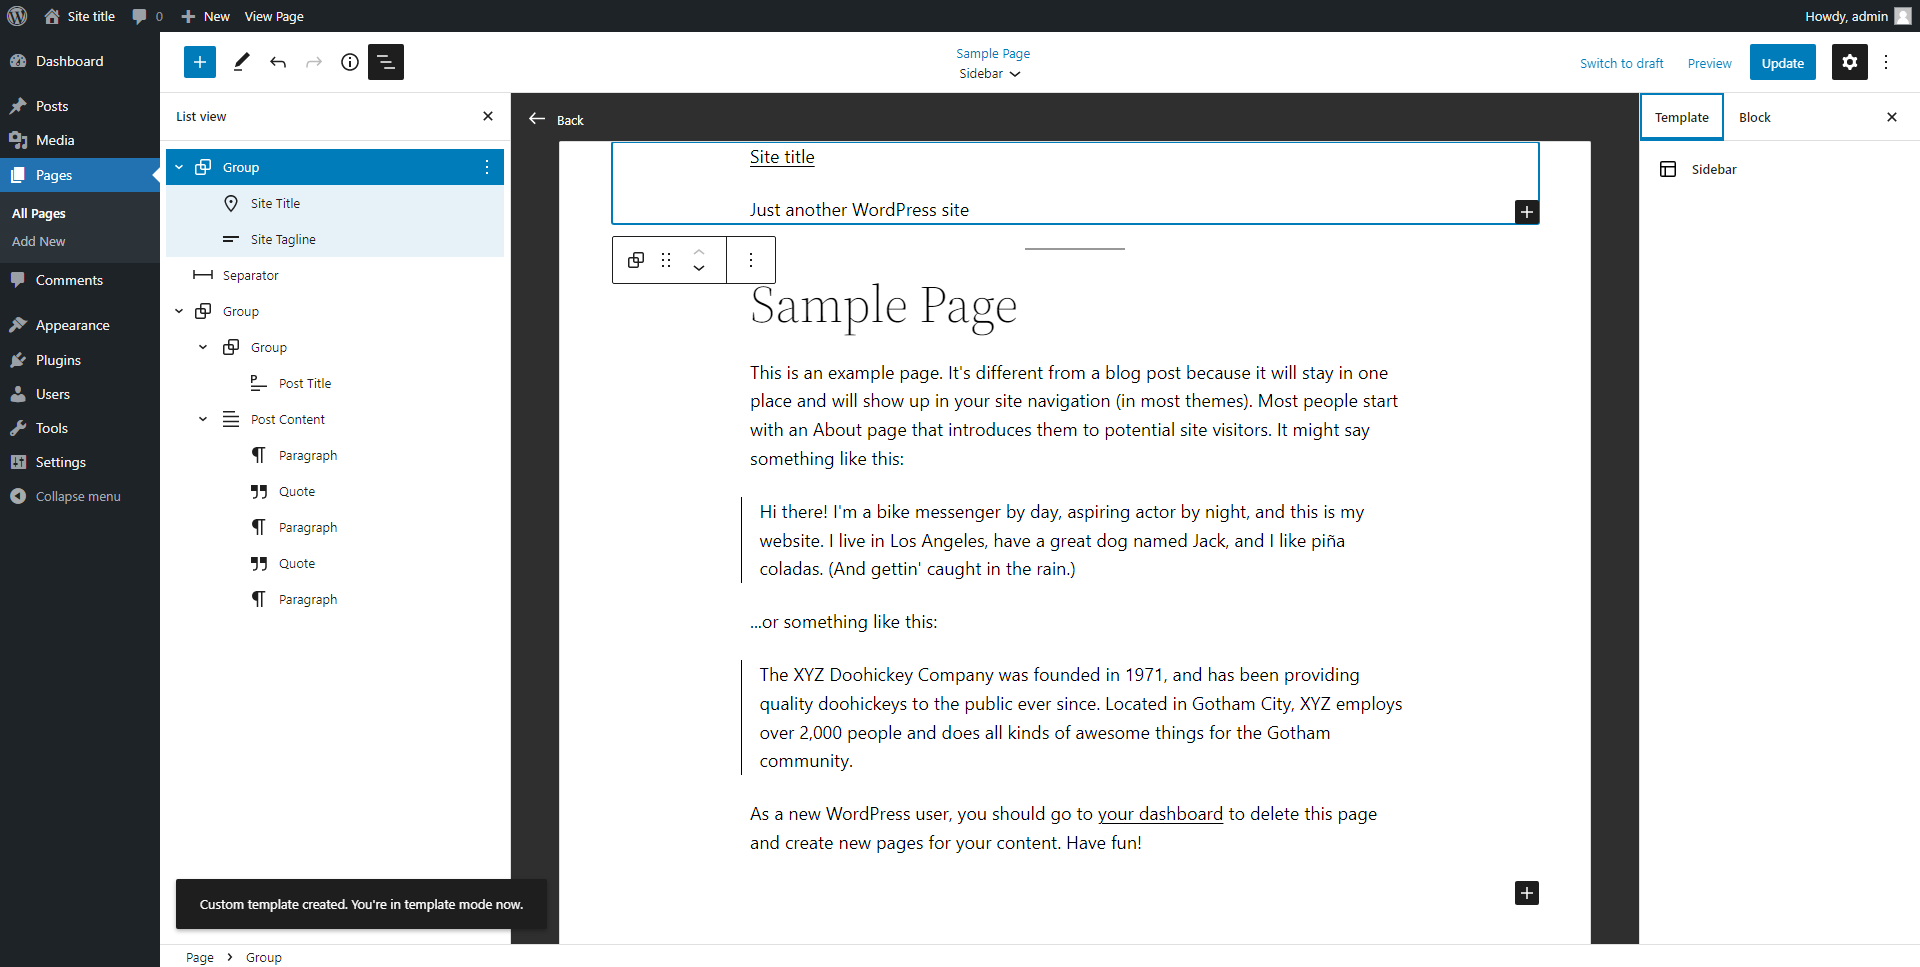
- Open the page you want to add the sidebar to in the block editor. In the page settings sidebar, go to the Template section: and click on New. Pick a name for your new template, for example “Sidebar”.
- After that, WordPress will open your new template in the template editor. You recognize the template editor from it’s dark grey border.
- To add the sidebar, you will need to move the existing blocks. It may be easier to select and move blocks with the help of the list view. To open the list view, click on the symbol with the three lines in the top toolbar.
- At the top of the editor, delete the site title, tagline and separator blocks. This is because you are going to replace them with a custom, premade header from the theme.
(Photo: Yoast)
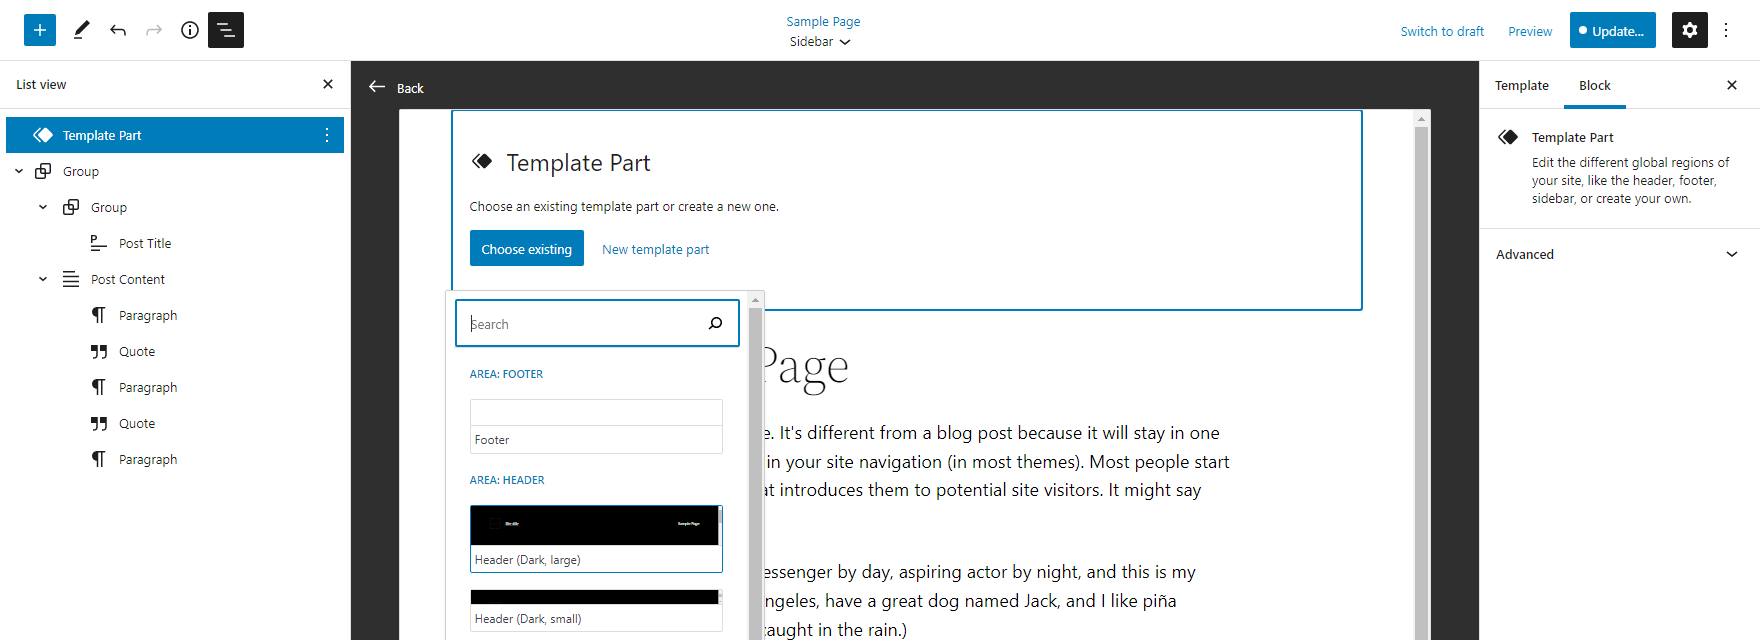
5. Insert a template part block, and select “Choose existing”. After that you can select one of the premade headers:
(Photo: Yoast)
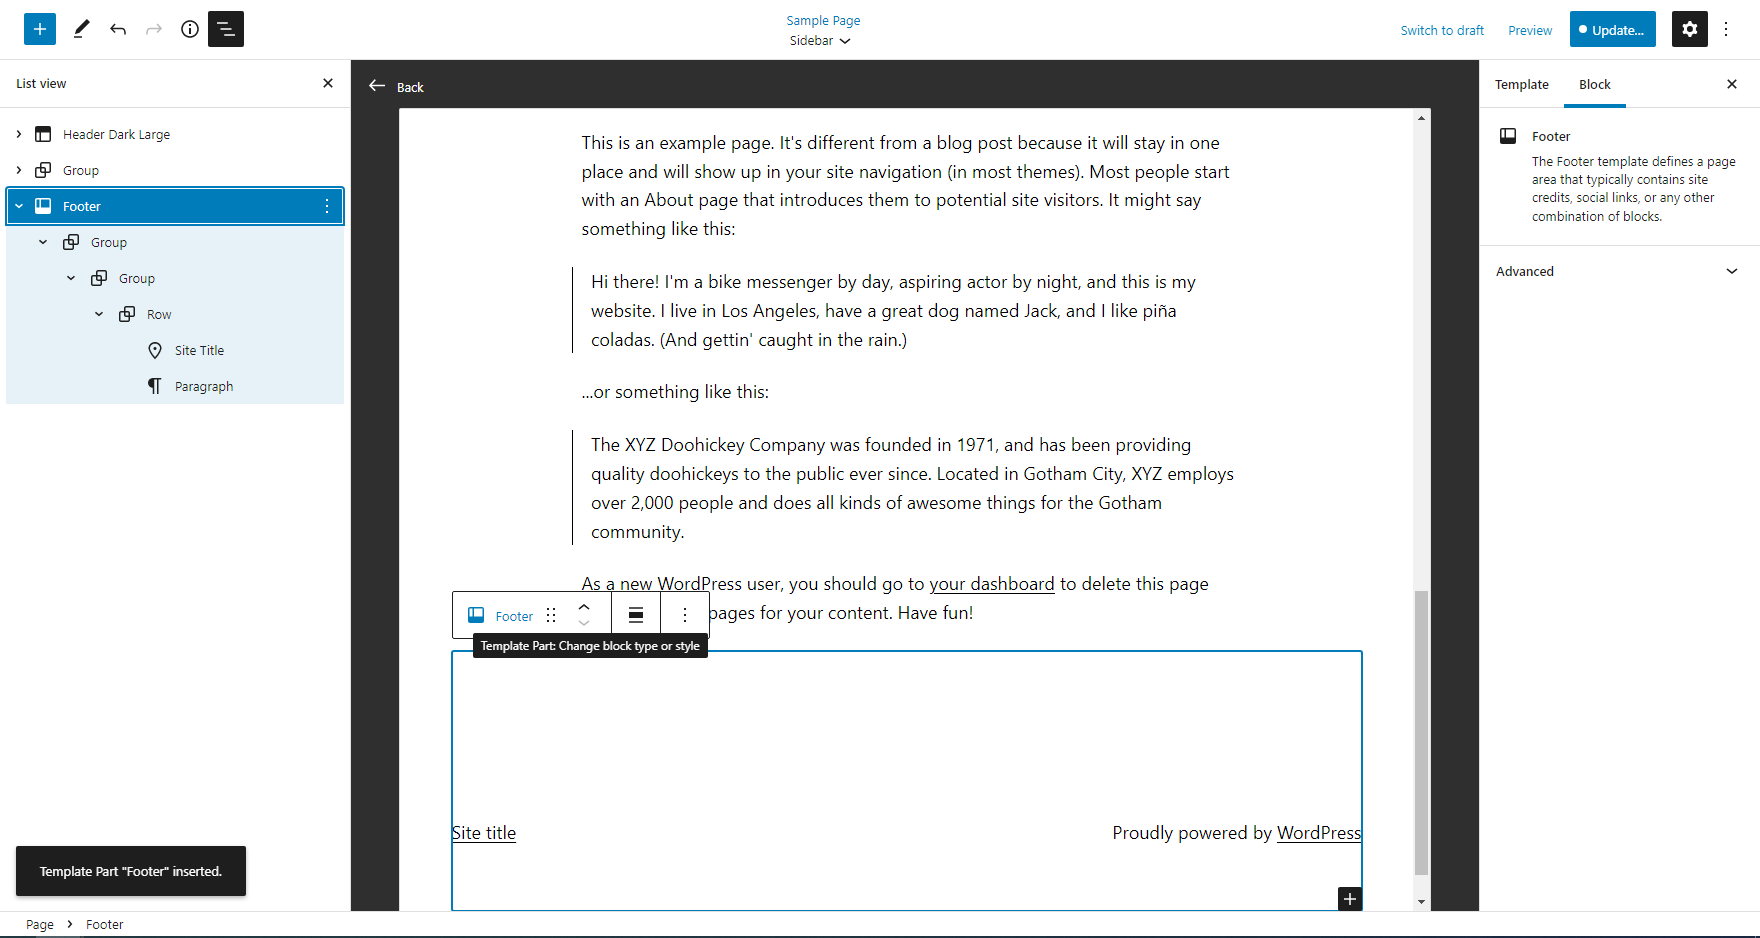
6. At the very bottom of the editor, below the content, repeat the process and insert a second template part for your footer:
(Photo: Yoast)
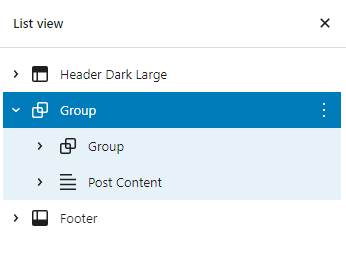
7. With your new header and footer in place, you can add the columns block that will be used to position your content and sidebar. Select the group block that is in between the header and footer:
(Photo: Yoast)
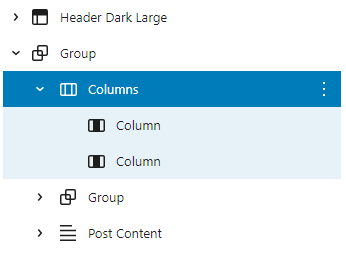
8. Inside the group block, add a columns block. The combination of 70/30 is a good option for your content and sidebar:
(Photo: Yoast)
9. After that, select the second Group block and the Post Content block in the list view and drag all the content inside the wide column. Your page should now look something like this:
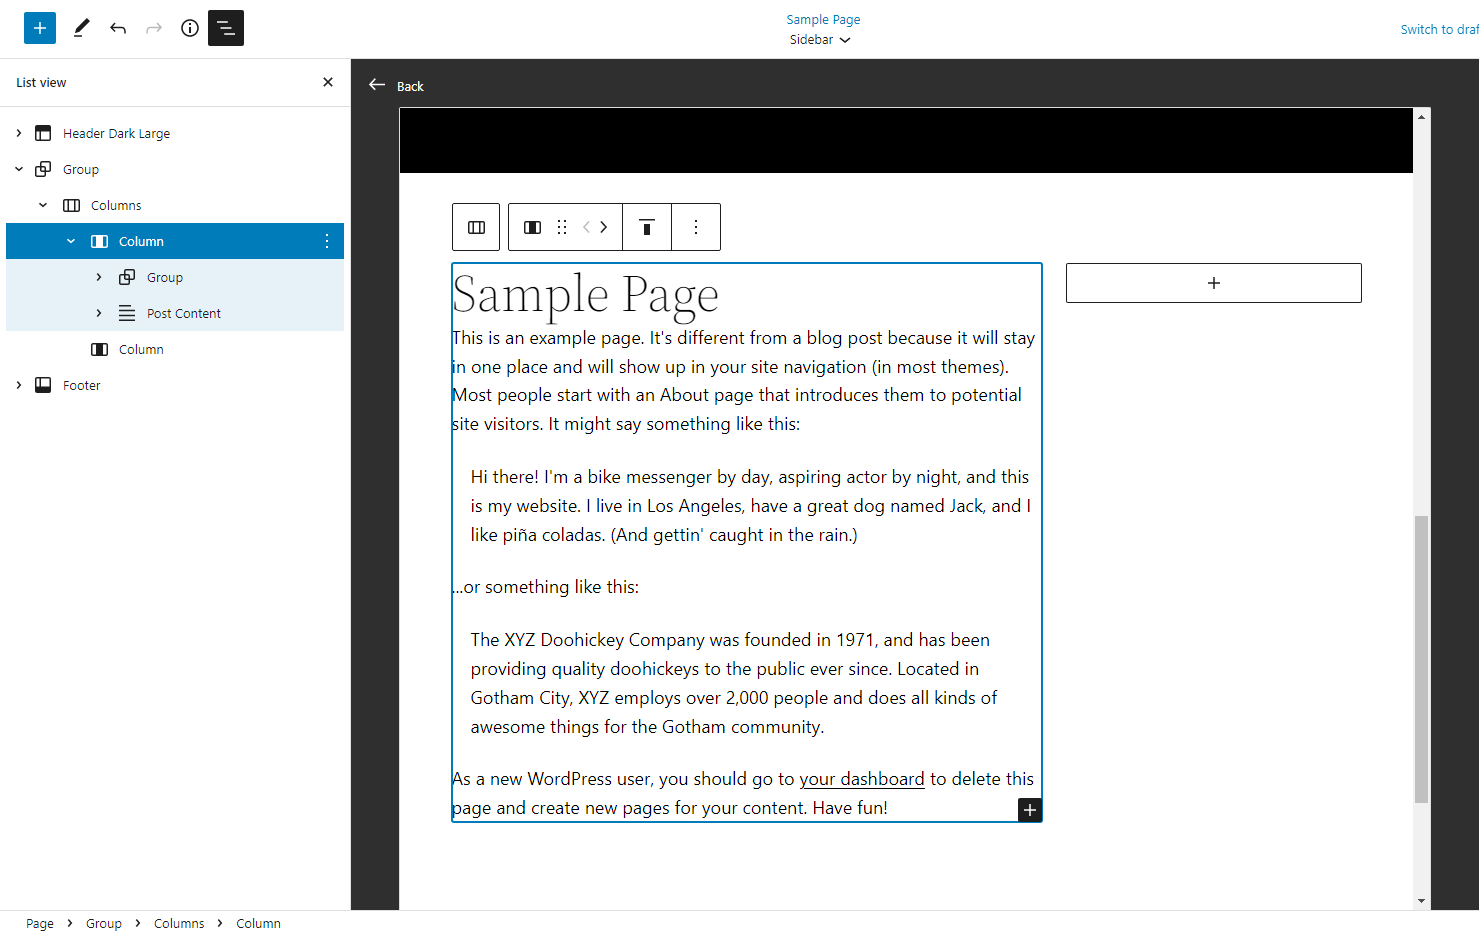
(Photo: Yoast)
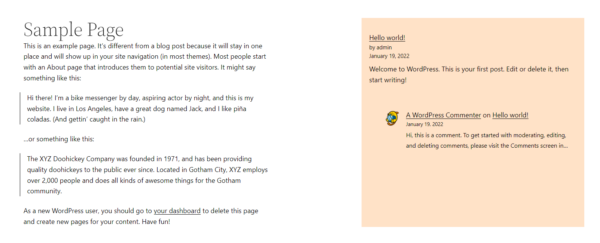
10. Place the blocks you would like to show in your sidebar in the narrow column. For example, a latest posts block, latest comments, a short text about the page author, or a gallery. Feel free to experiment. You can also test different color options and spacing.
Finally, you need to save the template and the page. If you like, you can re-use your new custom template on other pages as well.
Examples of websites using full site editing
So, are you looking for inspiration or want to know what you can actually achieve by using full site editing? We’ve collected some example websites for you to draw inspiration from!
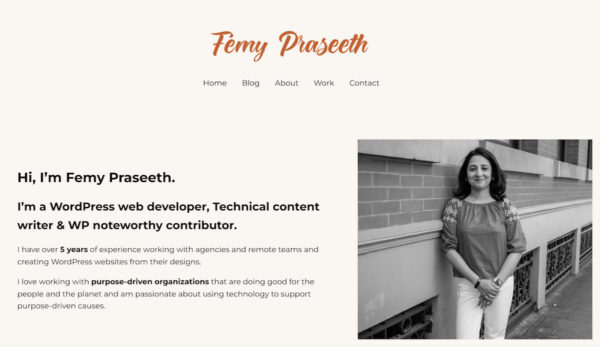
Personal websites
One example of a personal website that was created with the use of full site editing is femkreations.com:
A few other examples of personal websites using full site editing:
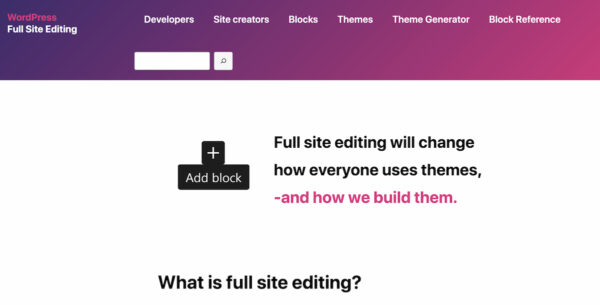
Business websites
This might not come as a surprise, but an example of a business website that was created with the use of full site editing is fullsiteediting.com:
A few other examples of business websites using full site editing:
Conclusion
Managing and editing every part of your site by using blocks can feel a bit scary at first. But trust us when we say that all the new customization opportunities outweigh the parts that can sometimes feel unpolished. The new ways to edit your website that we discussed in this article can be used to make many types of changes. Perhaps you want to change the text in your site footer or move the site logo? Full site editing makes this easier since you don’t need to change the code of your theme.
That being said, do make sure to put some thought into the changes you make. And if you are feeling overwhelmed, remember that these features are optional and that you don’t have to edit the blocks that don’t need any changing. The great part about full site editing is that it’s all up to you, so give it a try and let us know what you think!
Originally posted on Yoast.